I will be back after the first of the year. Sorry, there are a few things that must be taken care of.
See you soon!
Tuesday, December 11, 2012
Thursday, October 25, 2012
Hannah as "Fancy Nancy"
One thing I don't like about public school? The amazing ability of bacteria to spread like wildfire among the kids! Hannah seems to have caught a double whammy this past week or so. Between strep, a stomach virus and allergies, she was one pretty miserable little girl.
Thank goodness that we got her to the doctor and got antibiotics in her. She's feeling so much better.
Last week, before she got sick, was her school's book fair. On Tuesday we held a "come as your favorite book character" contest for the classes. Hannah loves Fancy Nancy and since her style is easily copied that's what she wanted to dress as.

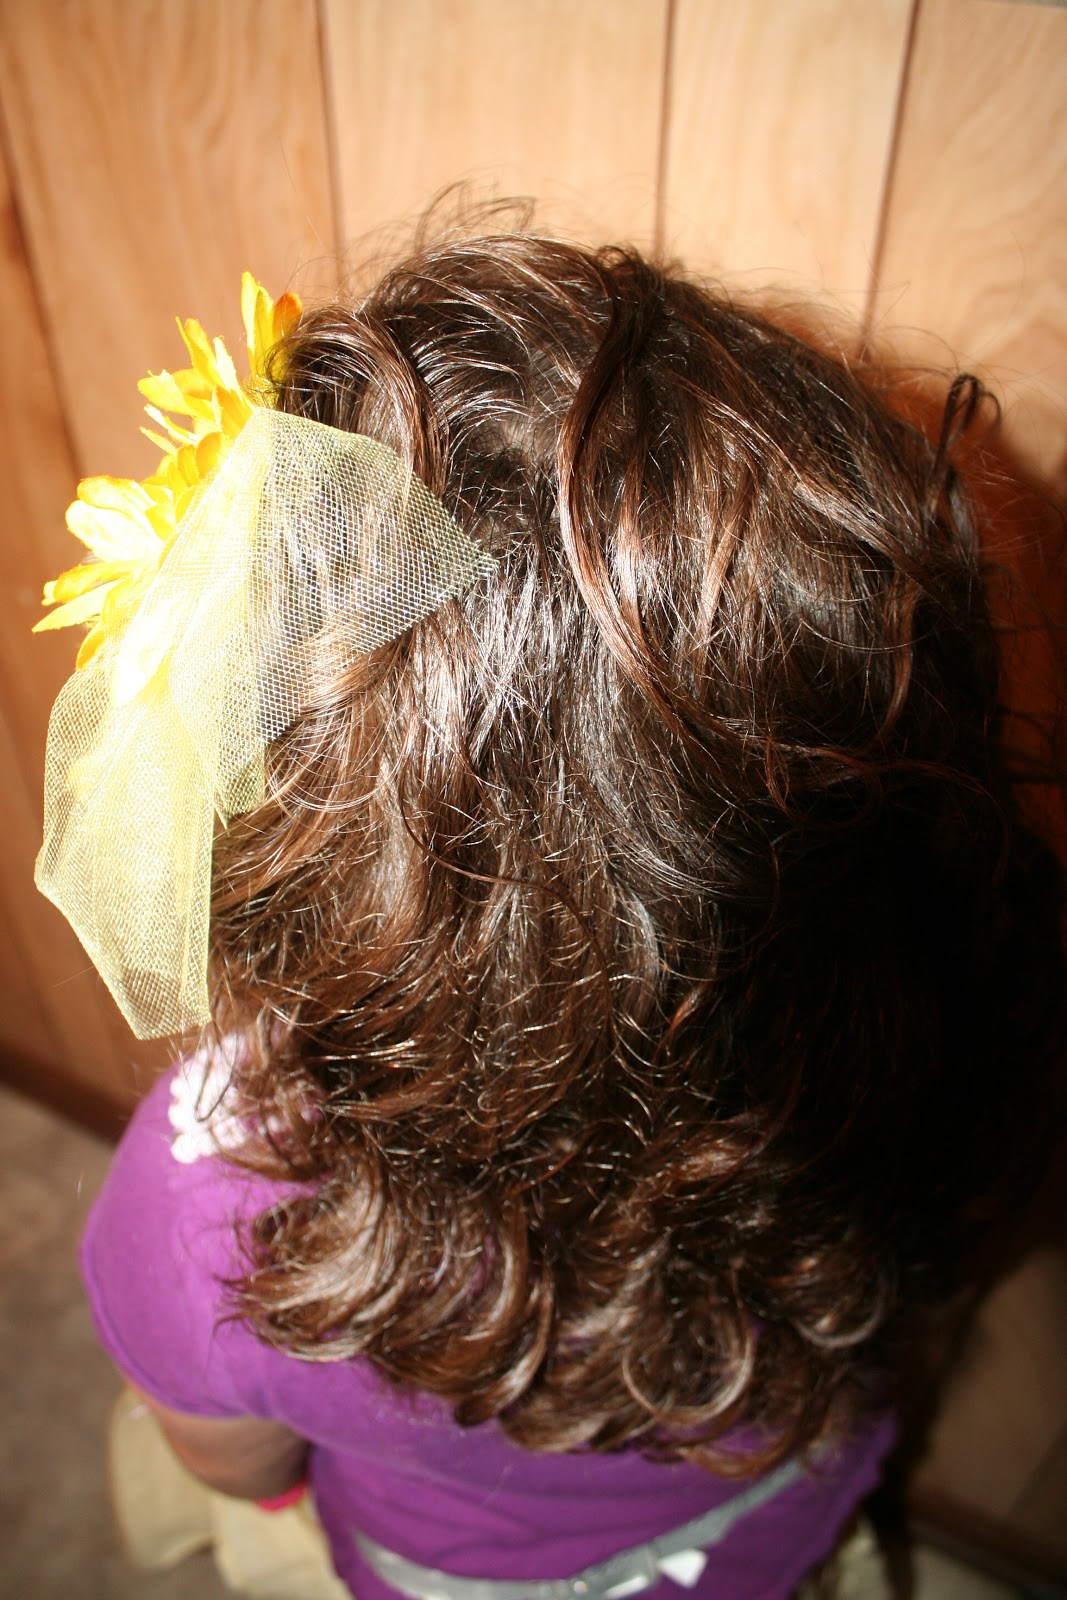


Yep, this is my little girl :D all dolled up and "fancy." The more jewelry, the better.
Sorry for the photo quality. For some reason my photo program won't open today.
It took about 1/2 an hour to curl and fluff up her hair and get that headband to stay in. Nancy usually wears a tiara, but we couldn't find hers, so we improvised.
Anything over the top. That was the motto.
I'll get back to crafting and experimenting with recipes as soon as I get over this lovely flu.
Thank goodness that we got her to the doctor and got antibiotics in her. She's feeling so much better.
Last week, before she got sick, was her school's book fair. On Tuesday we held a "come as your favorite book character" contest for the classes. Hannah loves Fancy Nancy and since her style is easily copied that's what she wanted to dress as.
Yep, this is my little girl :D all dolled up and "fancy." The more jewelry, the better.
Sorry for the photo quality. For some reason my photo program won't open today.
It took about 1/2 an hour to curl and fluff up her hair and get that headband to stay in. Nancy usually wears a tiara, but we couldn't find hers, so we improvised.
Anything over the top. That was the motto.
I'll get back to crafting and experimenting with recipes as soon as I get over this lovely flu.
Wednesday, October 17, 2012
Another pink stash page

Last summer, our family spent a fun day at Jolly Mill. What more could I ask for when an outing allows me to take pictures? But Brian wouldn't let me go all day and not get my picture taken a few times, too.
Another stash page resulted :D
I used my favorite product, Close to My Heart's liquid glass, on the butterfly stickers and heart stickers that dotted the page, along with the letters on Jolly Mill.
I decided to mat part of the title and the journal block to help separate them from the rest of the pink page.
Tomorrow I'll share Hannah's "Fancy Nancy" dress up day... not a scrap page, but she was sooooo cute!
Tuesday, October 16, 2012
Guitar Man
Wow. What a day! I have a great respect for mothers who work outside the home. I honestly don't know how they do it.
Today from 7:30 a.m. to 12:30 p.m., I worked at Hannah's book fair. I did it last year, too, just not as long. Normally, once I drop her off at school, I come back home, do my housework, study and bake or do anything else that needs to be done or craft or read a little. Today I had no time to do any of that. Good thing I don't have to pay too much attention to laundry or Brian wouldn't have a clean shirt to wear to work tomorrow!
The bright side... for every two hours I volunteer, I get a free book for Hannah!
Today's scrapbook page is one of my husband. I took this photo shortly after we were married last year because I think he looks great in a hat and absolutely love that he plays guitar.

Once again this was a "stashbook" page.
I used some brown plaid paper for the background and the same paper as a partial photo mat. For a larger mat, I used cream cardstock and for the small photo mat directly around the photo I used a dark brown cardstock -- the same I used for the title block.
The title was made with gold alphabet stickers with a printed guitar sticker angled for effect. I also scattered music note stickers for accents around the page.
And there you go... a page dedicated to my husband.
He's gonna love this post (note the sarcasm) LOL
Friday, October 12, 2012
For the love of PINK!
Pink, pink and more pink.
That is what Hannah likes.
OK. Well, she likes purple, too.
Those are her favorite colors. But at least she'll wear more than just pink because there is only so much pink a girl can handle... and this is coming from a person who really likes pink, too. ;0)
So in honor of Hannah's love for pink, I present THE PINK PAGES....


These are two more pages from my scrap stash.
Last summer, a couple months after Brian and I were married, the three of us went on a little day trip to the beautiful Jolly Mill. I took the opportunity to to take some adorable photos of our little Hannah.
I used an old paper from Doodlebug Design (VERY old. The back of the pages said 2004!) with little pink flowers all over.
On the left page I matted a photo on fuscia card stock for the top left with two more photos angled on the bottom for something a little different.
On the right page I matted three photos on the far right with one unmatted photo on the bottom left.
I matted alphabet stickers spelling Hannah's name on fuscia card stock, then cut out around them. I then glued the letters on six pretty pink and green tags, placing them across the middle of the spread.
I put the journaling information on two yellow squares to help them stand out a bit and placed a resin daisy on the top of each square.
A celebration of Hannah and pink!
Thursday, October 11, 2012
Me and my girls
Such a gloomy day outside. Days like this I just kind of want to curl up with a book or watch an old favorite movie. Who's with me?
Cooler days are here and with them, hot chocolate, more coffee (YES!) and fires in the fire pit. I just love fall!
It also means it's getting closer to November when I'll get to see my other "daughter" - my niece Amber and her husband. They only live about three hours away, but it may as well be 10 for as often as we get to see each other. Life and jobs sure do get in the way.
So in honor of my girls, I'm sharing a page of all three of us.

It's also another stash page.
The photo was taken this past July. It was kind of hard to get Hannah to smile for some reason, so we just got a goofy look on her face :0) She's such a character.
Once again I have no idea where the papers came from. The yellow paper actually has very light writing on it but it's hard to read and just adds another dimension to the page.
I deconstructed two pink silk roses and reconstructed them into three two-layer flowers on the yellow paper and three one-layer flowers across the bottom of the page. In the center of all the flowers I placed a tiny red gem from Close to My Heart.
I placed alphabet stickers for the title onto four tags. I covered the holes with yellow paper flowers and a little gem in the middle.
One photo, lots of embellishments and precious memories.
Cooler days are here and with them, hot chocolate, more coffee (YES!) and fires in the fire pit. I just love fall!
It also means it's getting closer to November when I'll get to see my other "daughter" - my niece Amber and her husband. They only live about three hours away, but it may as well be 10 for as often as we get to see each other. Life and jobs sure do get in the way.
So in honor of my girls, I'm sharing a page of all three of us.
It's also another stash page.
The photo was taken this past July. It was kind of hard to get Hannah to smile for some reason, so we just got a goofy look on her face :0) She's such a character.
Once again I have no idea where the papers came from. The yellow paper actually has very light writing on it but it's hard to read and just adds another dimension to the page.
I deconstructed two pink silk roses and reconstructed them into three two-layer flowers on the yellow paper and three one-layer flowers across the bottom of the page. In the center of all the flowers I placed a tiny red gem from Close to My Heart.
I placed alphabet stickers for the title onto four tags. I covered the holes with yellow paper flowers and a little gem in the middle.
One photo, lots of embellishments and precious memories.
Wednesday, October 10, 2012
Stashbooking!
I think I may have the world's largest scrapbook stash.
OK, maybe not the largest, but it definitely isn't small. The amount of scrapbook paper and embellishments I have accumulated over the past 12 years is astounding. And I have made it my goal to put a serious dent in my stash in the next few months.
For about four or five years I didn't scrap much because, well, because I had a demanding job that just sapped all my creative juices. Now don't get me wrong I loved my job, but by the time I got home at night one of the last things I wanted to do was break out the scrapping supplies and use my brain more. ;o) Didn't stop me from buying scrapping stuff, though. Hence, the stockpile.
But now that I am a stay-at-home mom and my daughter is in public school, I sometimes have a little time on my hands. And I have really gotten back into scrapping.
Good thing, too. My photos were really starting to stack up as well.
This page is an example of using my stash to the full. The only new items on the page are the gems on the tags.

These photos were taken of me and my wonderful husband this past July at our District Convention in Fort Smith, AR. We especially love that our daughter is peeking over my shoulders... which of course we didn't notice until I was looking at the photos later.
Since the paper and embellishments are from my stash, I have no idea what brand they are or even where I got them to begin with.
I know I bought the paper years ago, well before I met Brian, but I love that it's all hearts and X's and O's and "lover girl" and "lover boy" and all sorts of lovey dovey sentiments.
I used my corner rounder on the photos and on the mat behind the top photo and I used dark pink chalk to liven up the plain white mat.
I also matted the two tags on white paper, then position three gems (from Close to My Heart) on the lower right sides of the tags.
I found six tiny ribbon roses in light pink, white and red. I glued them in groups of three just to add a little something to the page.
On the top photo, I used five red gems in the shape of a flower and on the bottom photo I used two square/diamond gems to draw attention to the cute little face behind us.
Plan on seeing more creations from my stash!
OK, maybe not the largest, but it definitely isn't small. The amount of scrapbook paper and embellishments I have accumulated over the past 12 years is astounding. And I have made it my goal to put a serious dent in my stash in the next few months.
For about four or five years I didn't scrap much because, well, because I had a demanding job that just sapped all my creative juices. Now don't get me wrong I loved my job, but by the time I got home at night one of the last things I wanted to do was break out the scrapping supplies and use my brain more. ;o) Didn't stop me from buying scrapping stuff, though. Hence, the stockpile.
But now that I am a stay-at-home mom and my daughter is in public school, I sometimes have a little time on my hands. And I have really gotten back into scrapping.
Good thing, too. My photos were really starting to stack up as well.
This page is an example of using my stash to the full. The only new items on the page are the gems on the tags.
These photos were taken of me and my wonderful husband this past July at our District Convention in Fort Smith, AR. We especially love that our daughter is peeking over my shoulders... which of course we didn't notice until I was looking at the photos later.
Since the paper and embellishments are from my stash, I have no idea what brand they are or even where I got them to begin with.
I know I bought the paper years ago, well before I met Brian, but I love that it's all hearts and X's and O's and "lover girl" and "lover boy" and all sorts of lovey dovey sentiments.
I used my corner rounder on the photos and on the mat behind the top photo and I used dark pink chalk to liven up the plain white mat.
I also matted the two tags on white paper, then position three gems (from Close to My Heart) on the lower right sides of the tags.
I found six tiny ribbon roses in light pink, white and red. I glued them in groups of three just to add a little something to the page.
On the top photo, I used five red gems in the shape of a flower and on the bottom photo I used two square/diamond gems to draw attention to the cute little face behind us.
Plan on seeing more creations from my stash!
Tuesday, October 9, 2012
Heartfelt
This page has to be one of my favorites of all time. It's so elegant and features two of my favorite photos of my li'l Punkin. You can just see the mischievousness in her eyes!

Once again, I used only Close to Heart products. And Yay! I finally found the name of the paper collection... Sonoma.
I mounted the two photos on muted green card stock, leaving a bit more room on the top of one for the title. On the other, I took a portion of one of the border stickers and put it on the top of the mat, just to make it stand out a little more.
On the bottom right, I used two stickers matted on muted purple card stock. On the first I wrote the details of the photos. The second is a quote from Abraham Lincoln -- "And in the end, it's not the years in your life that count. It's the life in your years."
I used Liquid Glass on all the little sticker embellishments and on the "Heartfelt" title.
Then, to add a little more zing, I used the Liquid Glass on the curly ques in the paper itself.
I think the result is another simple and elegant page.
Friday, October 5, 2012
The Tapestry of Life
This morning my best friend asked me why I hadn't updated my blog in a while. Seems she checks it almost every day (she lives in Tennessee) and was getting a little tired of the banana bread recipe :D I promised her that I would be better at updating from now on.
I've been a little under the weather for a few weeks and have had to focus my energy on some other things. That's my story . . . and I'm sticking to it!
Cliche?
Well, I can be that every once in a while.
This page is the first time I have ever used products from only one brand. The paper, stickers, gems and liquid glass are from Close to My Heart. But if you ask me the name of the collection... well, that's where I draw a blank.
Liquid Glass is fast becoming my favorite scrapbook supply. It gives just the right amount of shine (without glitter) to a page and really amps up the star quality of what might be considered lackluster without it.
 The paper collection is just so beautiful -- all muted purples, greens and tans, swirls and paisley. Almost antiqued looking.
This spring, I took photos of Hannah wearing one of our favorite dresses, a feathered fan and her hair wreath from our wedding. The photos were perfect with the paper and embellishments.
I used the Liquid Glass on the large letters of the title, on one side of the left photo mat and the outline of the flower and purple gems as the center of the flowers.
I added Hannah's age and four purple gems in ascending sized on the circle sticker on the bottom right.
And that's that!
Tomorrow, I will share the other page that I used the same Close to My Heart collection.
I've been a little under the weather for a few weeks and have had to focus my energy on some other things. That's my story . . . and I'm sticking to it!
Cliche?
Well, I can be that every once in a while.
This page is the first time I have ever used products from only one brand. The paper, stickers, gems and liquid glass are from Close to My Heart. But if you ask me the name of the collection... well, that's where I draw a blank.
Liquid Glass is fast becoming my favorite scrapbook supply. It gives just the right amount of shine (without glitter) to a page and really amps up the star quality of what might be considered lackluster without it.
This spring, I took photos of Hannah wearing one of our favorite dresses, a feathered fan and her hair wreath from our wedding. The photos were perfect with the paper and embellishments.
I used the Liquid Glass on the large letters of the title, on one side of the left photo mat and the outline of the flower and purple gems as the center of the flowers.
I added Hannah's age and four purple gems in ascending sized on the circle sticker on the bottom right.
And that's that!
Tomorrow, I will share the other page that I used the same Close to My Heart collection.
Tuesday, September 25, 2012
Mmmm. Banana Bread.
Have I mentioned that breads of any kind are a particular weakness of mine? No?
The only bread I won't eat much of is the store-bought sandwich bread. Too many preservatives and it either tastes like dough or sawdust.
But give me fresh bread, sweet or otherwise, and I'm a goner.
One of my favorites is banana bread. The only problem with banana bread is that you have to wait until the bananas are overly ripe before it really tastes good. And sometimes I have the overripe bananas and don't feel like making the bread.
Problem.
But I finally found the solution. . . Freezing the overripe bananas.
Voila! Banana bread anytime!

Ingredients:
Directions:
Preheat oven to 350 degrees.
With a wooden spoon, mix butter into the mashed bananas in a large mixing bowl. Mix in the sugar, egg and vanilla.
Add baking soda and salt. Mix.
Add flour. Mix.
Pour mixture into one loaf pan or four mini loaf pans.
Bake for one hour.
The only bread I won't eat much of is the store-bought sandwich bread. Too many preservatives and it either tastes like dough or sawdust.
But give me fresh bread, sweet or otherwise, and I'm a goner.
One of my favorites is banana bread. The only problem with banana bread is that you have to wait until the bananas are overly ripe before it really tastes good. And sometimes I have the overripe bananas and don't feel like making the bread.
Problem.
But I finally found the solution. . . Freezing the overripe bananas.
Voila! Banana bread anytime!

Banana Bread
Ingredients:
- 3 or 4 very ripe bananas, smashed
- 1/3 cup melted butter
- 1 cup sugar
- 1 egg, beaten
- 1 teaspoon vanilla
- 1 teaspoon baking soda
- Pinch of salt
- 1 ½ cups all purpose flour
Directions:
Preheat oven to 350 degrees.
With a wooden spoon, mix butter into the mashed bananas in a large mixing bowl. Mix in the sugar, egg and vanilla.
Add baking soda and salt. Mix.
Add flour. Mix.
Pour mixture into one loaf pan or four mini loaf pans.
Bake for one hour.
Friday, September 21, 2012
The Next Generation
Turns out my love of scrapbooking has officially been passed on! I'm so proud! :D

Our little Hannah had been begging for months for her very own scrapbook and on a recent trip to Michael's we finally got her one... a cute little 8x8 Hello Kitty scrapbook kit because what girl (little or big) doesn't love Hello Kitty. I gave her some photos and she went to town!
One Sunday morning, she woke up before Brian and I did. (She's a morning person, what can I say?) When I got up I found her in the living room, scrapping her cute little heart out. Caught a few pictures of her working on a page about her and my niece Amber. She titled it "My Should-Be Sister." (I call Amber my "should-be daughter")
It's so wonderful to see my little girl catch the scrapping bug.
Thursday, September 20, 2012
Easy Peasy French Bread
I really have to get back into my blog :D Life with a husband and a 6-year-old can get super busy sometimes. I don't know how other mothers who have to work outside the home do it.
My parents came for a visit last weekend. I forget how much I miss them. I really wish I could sell my property and get them closer to Brian, Hannah and I.
Meanwhile, our assembly this weekend was sorely needed. It's amazing how we always get the spiritual food we need precisely when we need it.
Today's recipe is the French bread I made for the potato soup Friday night. I never thought I would make homemade bread but guess what? It's actually REALLY easy and only takes about an hour! Like it was just asking for me to make it!
Ingredients:
Directions:
Add yeast to the warm water. Sprinkle the sugar over the yeast and water. Let it sit for about five minutes until you see the yeast get all bubbly on top.
Stir in the salt, oil and flour.

Knead the dough for a few minutes until it is smooth and pulls away from the bowl. Like above.
 Cover your bowl with a warm wet towel and let the dough sit for about 15 minutes. TIP: turn the microwave on for two minutes and set the bowl of bread dough in the warm microwave for the 15 minutes. This warm environment makes the bread rise a lot faster.
The dough should have almost doubled after the 15 minutes.

Divide the dough into two long loaves and place side by side on a greased cookie sheet. Take a knife and slash the tops of each loaf diagonally.
Allow the loaves to sit for a few minutes while you preheat the oven to 375 degrees.
Bake for 30-35 minutes until golden brown.

OPTIONAL: Add herbs to mixture.
OPTIONAL: For an extra crunchy crust, mix together one egg white with 1 tablespoon cold water and brush on cooked bread. Cook for another 3 minutes.
See? Easy Peasy!
My parents came for a visit last weekend. I forget how much I miss them. I really wish I could sell my property and get them closer to Brian, Hannah and I.
Meanwhile, our assembly this weekend was sorely needed. It's amazing how we always get the spiritual food we need precisely when we need it.
Today's recipe is the French bread I made for the potato soup Friday night. I never thought I would make homemade bread but guess what? It's actually REALLY easy and only takes about an hour! Like it was just asking for me to make it!
Easy Peasy French Bread
Ingredients:
- 2 ½ cups warm water
- 2 tablespoons yeast
- 2 tablespoons sugar
- 1 teaspoon salt
- 3 tablespoons oil
- 5 ½ to 6 cups flour
Directions:
Add yeast to the warm water. Sprinkle the sugar over the yeast and water. Let it sit for about five minutes until you see the yeast get all bubbly on top.
Stir in the salt, oil and flour.

Knead the dough for a few minutes until it is smooth and pulls away from the bowl. Like above.

The dough should have almost doubled after the 15 minutes.

Divide the dough into two long loaves and place side by side on a greased cookie sheet. Take a knife and slash the tops of each loaf diagonally.
Allow the loaves to sit for a few minutes while you preheat the oven to 375 degrees.
Bake for 30-35 minutes until golden brown.

OPTIONAL: Add herbs to mixture.
OPTIONAL: For an extra crunchy crust, mix together one egg white with 1 tablespoon cold water and brush on cooked bread. Cook for another 3 minutes.
See? Easy Peasy!
Monday, September 10, 2012
When life throws you zucchini make bread!
Every summer most of us who have gardens are faced with the same question...
When did our zucchini start multiplying like rabbits and how do we get rid of it?
Well, make bread of course!
This year was mine and Brian's first garden together. I pretty much have a black thumb when it comes to plants of any kind, but Brian is pretty good at them. Maybe he gives the plants more attention and water. Wow. Maybe that's been my problem all along. Epiphany!
Anyway, we planted zucchini, tomatoes, bell peppers, jalapenos and herbs. It was more of an experiment for us than a real garden since we are truly beginners. Most of our plants did pretty good... especially after the month of 100+ degrees passed. But our zucchini got infected by some kind of bore and it killed both plants. We were very disappointed because we both love zucchini and I was really looking forward to making zucchini bread.
Thank goodness we have wonderful friends and family who kept us supplied with zucchini from their bountiful gardens.
I found this amazing recipe for zucchini bread that uses crushed pineapples. It's so good I could eat the entire recipe at one sitting!
Ingredients:
Directions:
Preheat oven to 350 degrees.
Beat eggs with a mixer. Add oil, sugar and vanilla.

Continue beating mixture until thick and foamy.

With a spoon, stir in the pineapple
 and zucchini.
 It will look like this
 In a separate bowl, combine flour, baking soda, salt, baking powder, cinnamon, and nutmeg.
 A fourth at a time, add dry ingredients into wet ingredients and gently stir by hand after each addition.

Until it looks like this

Add walnuts, raisins or craisins.
Pour into two prepared loaf pans. (I forgot to take a photo of this step)
Bake for 45 minutes (for mini loaves) to one hour.
Makes two loaves; eight mini loaves; or one loaf and four mini loaves.

When did our zucchini start multiplying like rabbits and how do we get rid of it?
Well, make bread of course!
This year was mine and Brian's first garden together. I pretty much have a black thumb when it comes to plants of any kind, but Brian is pretty good at them. Maybe he gives the plants more attention and water. Wow. Maybe that's been my problem all along. Epiphany!
Anyway, we planted zucchini, tomatoes, bell peppers, jalapenos and herbs. It was more of an experiment for us than a real garden since we are truly beginners. Most of our plants did pretty good... especially after the month of 100+ degrees passed. But our zucchini got infected by some kind of bore and it killed both plants. We were very disappointed because we both love zucchini and I was really looking forward to making zucchini bread.
Thank goodness we have wonderful friends and family who kept us supplied with zucchini from their bountiful gardens.
I found this amazing recipe for zucchini bread that uses crushed pineapples. It's so good I could eat the entire recipe at one sitting!
Zucchini Bread with Pineapple
Ingredients:
- 3 eggs
- 1 cup vegetable oil
- 2 cups sugar
- 2 teaspoons vanilla
- 2 cups grated zucchini
- 1 can (8 oz.) crushed pineapple (or ½ of a 20 oz. can)
- 3 cups all purpose flour
- 2 teaspoons baking soda
- 1 teaspoon salt
- ½ teaspoon baking powder
- 1 ½ teaspoon cinnamon
- ¾ teaspoon nutmeg
- 1 cup chopped walnuts (optional)
- 1 cup raisins or craisins (0ptional)
Directions:
Preheat oven to 350 degrees.
Beat eggs with a mixer. Add oil, sugar and vanilla.
Continue beating mixture until thick and foamy.
With a spoon, stir in the pineapple
Until it looks like this
Add walnuts, raisins or craisins.
Pour into two prepared loaf pans. (I forgot to take a photo of this step)
Bake for 45 minutes (for mini loaves) to one hour.
Makes two loaves; eight mini loaves; or one loaf and four mini loaves.
Friday, September 7, 2012
I'm Baaaack!... with a five-braid bun
See. This is what happens when life and being sick get in the way. My creative juices just weren't flowing -- not even in the kitchen. My poor family.
I'm usually so organized and have meals planned out but when I get sick, that all goes out the window and it's "Hello, Hamburger Helper." Not that the hubby or the daughter would ever complain about that. I admit that I have a prejudice against Hamburger Helper. To me it's something I cooked when it was just me or I didn't feel like cooking. So when Brian and I were married I NEVER made Hamburger Helper.
We were married about four months when he and Hannah actually asked me to please make Hamburger Helper :D He used to make it a lot when it was just the two of them and they actually missed it!
So now, I make it about once a month. Gives me a night off every once in a while and it makes them happy. And that's what being a wife, mom and friend is all about -- making people happy. And when making a boxed meal makes someone happy, I'm all for it.
With that in mind, today was the first "Fancy Friday" for Hannah's first grade class. The kids get to dress up if they want, learn "fancy" words and do "fancy" things. Hannah was so very excited and begged to wear a dress and a special style for her hair.
In case you didn't know, I love doing new styles with her hair. I comb the Internet, ok, I comb Pinterest, and find some really cute styles which I then modify for Hannah's hair.
Today, though, I wanted to do her hair in an updo, because it's supposed to be hot and she gets overheated at recess when her hair is down. So I chose to do a bun.
However, being me, I just couldn't leave it at a simple bun. So I created what I call a "five-braid bun." And she LOVED it.
See? Something simple to make her happy.
So here's the five-braid bun...
First I pulled her hair into a smooth pony tail in the center of her head.
Then I took a small section of the pony tail and wrapped around the elastic holder, using bobby pins to secure the hair.
Next, I loosely braided the pony tail in five small braids.
Then, using bobby pins, I pinned the braids in loose loops above the pony tail.
Finally, I finished with little flowers to give it a little oomph.
Because it is a looser style, it starts out just a little "messy" so it doesn't matter that it will get a little looser as the day goes on.
Here are a couple more photos of the bun.
Thursday, August 23, 2012
Wedding layout -- honor attendants
Today's scrapbook page once again comes from our wedding scrapbook -- which I'm still working on after more than a year of marriage :D
Our photographer took some great photos, including these two photos of our honor attendants with us. (I have other pages with them, too. They will appear in a separate post.)
 I wanted an elegant page incorporating both "sets" of attendants.
First, I stamped an elegant border and the title on cream-colored cardstock. I cut the title out, rounded the edges and "popped" it up, using pop-up dots. I accented the border stamp with purple rhinestones and added two daisies, one dark and one light, from our wedding flowers.
For the girls' block, I used a cream-colored paper with a quilted texture.
I printed all the attendants' names and bulleted them with a purple rhinestone.
Finally, I added lily of the valley to the bottom right corner for some added pizzaz.
And there you go. A simple and elegant page honoring our dear friends and family who stood up with us.
Tomorrow.... Lasagna!
Our photographer took some great photos, including these two photos of our honor attendants with us. (I have other pages with them, too. They will appear in a separate post.)
First, I stamped an elegant border and the title on cream-colored cardstock. I cut the title out, rounded the edges and "popped" it up, using pop-up dots. I accented the border stamp with purple rhinestones and added two daisies, one dark and one light, from our wedding flowers.
For the girls' block, I used a cream-colored paper with a quilted texture.
I printed all the attendants' names and bulleted them with a purple rhinestone.
Finally, I added lily of the valley to the bottom right corner for some added pizzaz.
And there you go. A simple and elegant page honoring our dear friends and family who stood up with us.
Tomorrow.... Lasagna!
Tuesday, August 21, 2012
Chore Charts and Trying to Teach Responsibility
Brian and I are big believers in trying to teach Hannah to take responsibility . . . for the things she has and for her actions (or lack of action).
Keeping that in mind, we have tried different methods in the past to teach her -- from chore charts, groundings, earning money, positive reinforcements, negative reinforcements, etc. But she is still a little girl and like most children, she doesn't really like to do what she doesn't WANT to do. And many times she complains . . . LOUDLY.
But we keep on training her and showing her by example that it is very important that we keep a clean house and body, and that sometimes we all have to do what we may not consider fun. But all in all, if we all do what we need to do, it leads to a much happier and peaceful home and family.
So I'm trying once again, to make "chores" fun . . . or at least less of a dread. I scour the Internet -- especially Pinterest -- looking for ideas and I found one I though might actually work. A mini chore and things to do chart.
The trick is to make it cute and small so that it's easier for the kids to look at it.
Here is the original link ... http://www.brownpaper--packages.com/2012/08/chore-chart-on-ring.html

The first thing I did was type in the title and then each day and lists of the things she was responsible for each day. Notice that not all things are chores and they do change slightly from day to day. All things are age appropriate and I have carved out 10 to 30 minutes of reading time each day except Tuesday, depending on when we have family worship or personal study. Since worship and personal study both entail a lot of reading, I shortened those days' reading time.
Then I printed them out on different sheets of brightly colored paper, cut them out and laminated them. I cut them out again and rounded the corners. (I hate sharp corners, they hurt more than you would think they do)
After that, I put them on a ring. (You can buy a package of about 8 to 10 rings at the most stores for less than $2)


Then I decorated each page with cute little dragonfly and flower pop-ups.
Finally, I hung the chart up on the front of our refrigerator to help remind her to do her chores. I really like the magnet hooks I found. They really make putting things on the refrigerator a lot easier.

We just implemented it this week, so we'll see how it goes. Hopefully, this one will work!
Do you have any ideas to help kids learn responsibility?
Keeping that in mind, we have tried different methods in the past to teach her -- from chore charts, groundings, earning money, positive reinforcements, negative reinforcements, etc. But she is still a little girl and like most children, she doesn't really like to do what she doesn't WANT to do. And many times she complains . . . LOUDLY.
But we keep on training her and showing her by example that it is very important that we keep a clean house and body, and that sometimes we all have to do what we may not consider fun. But all in all, if we all do what we need to do, it leads to a much happier and peaceful home and family.
So I'm trying once again, to make "chores" fun . . . or at least less of a dread. I scour the Internet -- especially Pinterest -- looking for ideas and I found one I though might actually work. A mini chore and things to do chart.
The trick is to make it cute and small so that it's easier for the kids to look at it.
Here is the original link ... http://www.brownpaper--packages.com/2012/08/chore-chart-on-ring.html
And now for "Hannah's Chores and List of Things To Do"
The first thing I did was type in the title and then each day and lists of the things she was responsible for each day. Notice that not all things are chores and they do change slightly from day to day. All things are age appropriate and I have carved out 10 to 30 minutes of reading time each day except Tuesday, depending on when we have family worship or personal study. Since worship and personal study both entail a lot of reading, I shortened those days' reading time.
Then I printed them out on different sheets of brightly colored paper, cut them out and laminated them. I cut them out again and rounded the corners. (I hate sharp corners, they hurt more than you would think they do)
After that, I put them on a ring. (You can buy a package of about 8 to 10 rings at the most stores for less than $2)
Then I decorated each page with cute little dragonfly and flower pop-ups.
Finally, I hung the chart up on the front of our refrigerator to help remind her to do her chores. I really like the magnet hooks I found. They really make putting things on the refrigerator a lot easier.
We just implemented it this week, so we'll see how it goes. Hopefully, this one will work!
Do you have any ideas to help kids learn responsibility?
Friday, August 17, 2012
Cream Cheese Stuffed Jalapenos
It has definitely been a hectic week.
Hannah started first grade Wednesday and she's enjoying every minute of it.
I've been playing catch-up on getting reorganized. It's amazing how far behind a person gets when they have a very active 6-year-old at home :D
Today's recipe is a simple one from my sister-in-law, Cynthia. When she and my brother-in-law David were visiting a few weeks ago, she made the most delicious stuffed jalapenos. They tasted so good, I was surprised they were so simple.
So here it is... The recipe.... Get ready....
Yes, that is it!
Now here are the steps...
First, cut the jalapenos in half and take out the seeds. A word of advice... WEAR GLOVES. (I found that out the hard way. My hands burned for two days!)
Next, put cream cheese in the jalapenos. At this point, I put some jalapenos back together and left some halved. I preferred the ones that remained halved.
 Now, slice bacon slices in half and wrap around jalapenos. Secure with a toothpick.
 Then bake in a 350 degree oven for 20 to 30 minutes, until bacon is cooked. Broil for another 5 to 10 minutes, until bacon is crisp.
This is what you get...

Finally.... ENJOY!
We enjoyed these so much, I'm making them again tonight. This time I'm trying banana peppers and some milder peppers Brian bought at the farmer's market.
Hannah started first grade Wednesday and she's enjoying every minute of it.
I've been playing catch-up on getting reorganized. It's amazing how far behind a person gets when they have a very active 6-year-old at home :D
Today's recipe is a simple one from my sister-in-law, Cynthia. When she and my brother-in-law David were visiting a few weeks ago, she made the most delicious stuffed jalapenos. They tasted so good, I was surprised they were so simple.
So here it is... The recipe.... Get ready....
- Jalapenos
- Cream cheese
- Bacon
Yes, that is it!
Now here are the steps...
First, cut the jalapenos in half and take out the seeds. A word of advice... WEAR GLOVES. (I found that out the hard way. My hands burned for two days!)
Next, put cream cheese in the jalapenos. At this point, I put some jalapenos back together and left some halved. I preferred the ones that remained halved.


This is what you get...

Finally.... ENJOY!
We enjoyed these so much, I'm making them again tonight. This time I'm trying banana peppers and some milder peppers Brian bought at the farmer's market.
Monday, August 13, 2012
Cooler Weather and Mirror Pages
The weather has been so nice today. In the 70s and a nice wind blowing. So very much nicer than the more than a month of 100+ degrees!
I sat outside for a couple hours today, watching Hannah ride her bike. I actually needed a small wrap because I got a little chilly.
Hmmm. Chili. Maybe I'll have Brian make is "Oh so good chili" next week.
Today's post is about the mirror pages in our wedding album... "Bride" and "Groom."


The photos themselves are pasted on torn mulberry paper to soften them up.
On the sides of the pages I tore a piece of white cardstock and a sheet of purple cardstock and glued them to the sides with the torn edges showing.
On top of those I took leftover silk flowers from the wedding and, using pop dots, glued three of them on the side of each page.
For the title I inked the edges of a white piece of cardstock and, once again using pop dots, glued them below the photo, placing a pretty little lilac daisy in each corner.
I used glitter glue for the stenciled and cut out letters to bring attention and give the page a little bling, cause I have to have my bling!
And that's that.
And now I'm off to fix Hannah's hair for her open house tonight.
I wonder if I can talk her out of wearing her pink dress?
Friday, August 10, 2012
The Cherry Clafoutis Experiment... not as difficult as it sounds
After hitting a sale on cherries a couple weeks ago, I desperately needed to find a recipe that used my beautiful bing cherries because, as I was the only one eating them, those cherries just weren't disappearing that fast.
After searching for a while, I stumbled upon a Cherry Clafoutis recipe.
That's right.
I was going to be speaking French by the end of the night!
Ok, maybe not, but the title sounded deceptively complicated and just intriguing enough that I had to try it.
It's basically just a French custard with cherries. You can make it with other berries and fruits, too.
So here it is. My attempt at Cherry Clafoutis.

Ingredients:
Directions:
Can be served warm or cold.
See... Simple. Just the kind of recipe I like.
Mine didn't turn out as pretty as the other pictures I saw, but it tasted good anyway.
Next time I'll try another fruit.
After searching for a while, I stumbled upon a Cherry Clafoutis recipe.
That's right.
I was going to be speaking French by the end of the night!
Ok, maybe not, but the title sounded deceptively complicated and just intriguing enough that I had to try it.
It's basically just a French custard with cherries. You can make it with other berries and fruits, too.
So here it is. My attempt at Cherry Clafoutis.

Cherry Clafoutis
Ingredients:
- 1 pound cherries
- 1 cup milk
- 1/2 cup sugar
- 1/2 cup flour
- 1/8 teaspoon salt
- 2 tablespoons melted butter
- 3 eggs
- 2 teaspoons vanilla extract
Directions:
- Preheat the oven to 350 degrees. Spray cake pan generously with non-stick cooking spray.
- Wash and dry the cherries and remove the stems and pits. The recipe I found said not to remove the pits because it adds extra flavor, but I really didn't want to bite down on a pit.
- Distribute the cherries in the pan.
- Whisk together the flour, sugar, and salt in a mixing bowl.
- Whisk in the milk.
- Whisk in the eggs, melted butter and vanilla extract.
- Pour batter on top of the cherries.
- Bake for 45 minutes or until the custard is cooked through.
Can be served warm or cold.
See... Simple. Just the kind of recipe I like.
Mine didn't turn out as pretty as the other pictures I saw, but it tasted good anyway.
Next time I'll try another fruit.
Thursday, August 9, 2012
Lack of Lasagna and Two More Wedding Pages
Well, I was going to write about my attempt at making lasagna rolls, however, last evening when I was gathering my ingredients I discovered that someone (ahem, my husband) had eaten the cottage cheese!
Disaster! What's a girl to do when she has all the makings of lasagna but no cheese!?! AND she's already started the sauce?!?
Well, what any normal girl would do. We had Pasta alla Reg! A.K.A. my tomato and meat sauce with rigatoni pasta.
It turned out good and I was able to try a little trick I heard about and had never tried. I added a bit of half and half to my sauce. Brian and Hannah couldn't tell the difference, but I could :D
So in place of my lasagna rolls - which I will attempt to make again in a couple weeks - here are two more pages from our wedding scrapbook.
This page is the first page of our book...
 I used two of my favorite photos of Brian and I. I put them on a pretty lilac colored background paper with raised ivory swirls.
The top right journaling block is titled "Just One Day in our Story" and documents the important dates in our relationship -- from the day we met, to the day he proposed, to the day we joined our lives together.
I love bling and had some beautiful lilac-colored beads with rhinestones on them which I used to "bullet" the dates and add a bit of sparkle to the page.
On the bottom left is a broach I have had for years. I used to wear it on a necklace but it's not really my style anymore but it was just too beautiful to give away or sell. I knew I kept it for a reason! The colors go great with the page and it adds just a little something extra to the page.
This next page is the second page of our album.

The Bible is very important to us and we use it daily. It is the basis of our relationship and family and is what we base all our decisions on -- large and small. And it played an important role in our wedding ceremony. Most of our guests also share our faith and so many of them brought their Bibles to the ceremony.
Our wonderful photographer knew how important the Bible is to us and he captured an open Bible in one of our guests hands. I took the opportunity to scrap one of the many scriptures read during the ceremony, 1 Corinthians 13:4-8, and titled the page "Love is..."
It was a simple page to do. I printed the title letters in a pretty cursive font and cut them out with an exacto knife. Then I printed the scripture on pink vellum and attached it with four brads.
Simple.
Well, I'm off to make sure Hannah's new backpack is still organized for school next week. My husband's wonderful parents took her (and two of their grandsons) shopping yesterday for school supplies. Hannah had all of her supplies except a new backpack.
And what backpack did she get?
What else but a Hello Kitty? With animal print!
Disaster! What's a girl to do when she has all the makings of lasagna but no cheese!?! AND she's already started the sauce?!?
Well, what any normal girl would do. We had Pasta alla Reg! A.K.A. my tomato and meat sauce with rigatoni pasta.
It turned out good and I was able to try a little trick I heard about and had never tried. I added a bit of half and half to my sauce. Brian and Hannah couldn't tell the difference, but I could :D
So in place of my lasagna rolls - which I will attempt to make again in a couple weeks - here are two more pages from our wedding scrapbook.
This page is the first page of our book...

The top right journaling block is titled "Just One Day in our Story" and documents the important dates in our relationship -- from the day we met, to the day he proposed, to the day we joined our lives together.
I love bling and had some beautiful lilac-colored beads with rhinestones on them which I used to "bullet" the dates and add a bit of sparkle to the page.
On the bottom left is a broach I have had for years. I used to wear it on a necklace but it's not really my style anymore but it was just too beautiful to give away or sell. I knew I kept it for a reason! The colors go great with the page and it adds just a little something extra to the page.
This next page is the second page of our album.

The Bible is very important to us and we use it daily. It is the basis of our relationship and family and is what we base all our decisions on -- large and small. And it played an important role in our wedding ceremony. Most of our guests also share our faith and so many of them brought their Bibles to the ceremony.
Our wonderful photographer knew how important the Bible is to us and he captured an open Bible in one of our guests hands. I took the opportunity to scrap one of the many scriptures read during the ceremony, 1 Corinthians 13:4-8, and titled the page "Love is..."
It was a simple page to do. I printed the title letters in a pretty cursive font and cut them out with an exacto knife. Then I printed the scripture on pink vellum and attached it with four brads.
Simple.
Well, I'm off to make sure Hannah's new backpack is still organized for school next week. My husband's wonderful parents took her (and two of their grandsons) shopping yesterday for school supplies. Hannah had all of her supplies except a new backpack.
And what backpack did she get?
What else but a Hello Kitty? With animal print!
Wednesday, August 8, 2012
Multi photo wedding page
When Brian and I were married last year, it was the first (and last) marriage for both of us and we wanted to do it right. Something classy and elegant, but also comfortable and fun. We toyed with the idea of a very small wedding with just family and very close friends, but in the end we decided we wanted to share our joy with as many people of our friends as we could.
Brian's a good sport and let me choose the color palette and most of the decorations. I'm just glad he actually likes purple and silver.
I like this page because it captures the feeling of the entire wedding and reception. Plus we had an awesome photographer who took hundreds of great photos. There is no way I will ever be able to use all the photos in a book and this was a way to get many of them on one page.

I use Shutterfly to develop most of my photos and when they send pictures back, they include a proof sheet in the package. I saw all those tiny little pictures and thought "What great idea to make a page with all of these!"
Halfway through the page my thought was "What was I thinking?!?"
But I have to say, I really love the way it turned out. It was worth the hours of work.
The large photo is an artsy shot of the entrance to our reception. I love how our photographer managed to capture the beautiful chandelier in the hotel.
Surrounding the photo are the tiny little proof photos. In between all of the photos are strips of purple ribbon and pretty little white daisies with rhinestone middles are scattered throughout the page.
On the right side of the page I used two small strips of silver ribbon.
I also wanted to bring attention to one of my favorite photos of Brian and Hannah dancing, so I used a pop-up dot to pop it up from the page.

And finally, I used a couple of heart and swirl stamps in the white space I left. I highlighted portions of the stamp with my liquid glass from Close to My Heart.
In this photo, you can also see the little daisies I used on the page.
 And that's it!
It was time consuming, but totally worth it!
Brian's a good sport and let me choose the color palette and most of the decorations. I'm just glad he actually likes purple and silver.
I like this page because it captures the feeling of the entire wedding and reception. Plus we had an awesome photographer who took hundreds of great photos. There is no way I will ever be able to use all the photos in a book and this was a way to get many of them on one page.

I use Shutterfly to develop most of my photos and when they send pictures back, they include a proof sheet in the package. I saw all those tiny little pictures and thought "What great idea to make a page with all of these!"
Halfway through the page my thought was "What was I thinking?!?"
But I have to say, I really love the way it turned out. It was worth the hours of work.
The large photo is an artsy shot of the entrance to our reception. I love how our photographer managed to capture the beautiful chandelier in the hotel.
Surrounding the photo are the tiny little proof photos. In between all of the photos are strips of purple ribbon and pretty little white daisies with rhinestone middles are scattered throughout the page.
On the right side of the page I used two small strips of silver ribbon.
I also wanted to bring attention to one of my favorite photos of Brian and Hannah dancing, so I used a pop-up dot to pop it up from the page.
And finally, I used a couple of heart and swirl stamps in the white space I left. I highlighted portions of the stamp with my liquid glass from Close to My Heart.
In this photo, you can also see the little daisies I used on the page.
It was time consuming, but totally worth it!
Subscribe to:
Posts (Atom)